Gold panning is a small-scale method for separating native gold from stream and river gravels by using a gold pan. The first recorded use of a pan to collect gold dates back to Roman times.
A simple form of placer mining, gold panning is still popular today both with prospectors and folks that have no gold mining background.
If you’re a beginner to gold panning, read on as I’ll go over some gold panning history, how to pan for gold, basic gold panning equipment and even a couple of great beginner areas to try your luck gold panning.
Gold Panning history
Here in the US, during the gold rush days of 170+ years ago, the rivers of the Mother Lode country of California; the Yuba, American and Feather among others, had so much gold in them, that a lot of prospectors and miners could make a decent living by panning the gravels.
Very, very few struck it rich, some made barely enough to buy beans, bacon and whisky, and some gave up or followed others to the next “rich” strike.
If a prospector became good at reading and sampling a river for places where the gold was concentrated, known as pay streaks, and if he could stake a claim on some good ground before the next guy did, he might make a good profit. Possibly enough to upgrade his mining gear to a sluice, rocker box or a long tom. Maybe even have some money to take home when the placers played out.
As the California gold rush gradually wound down, prospectors fanned out across the western US looking for new, rich placer deposits, and many were found, some large, some small.
Prospectors would sample stream and river gravels in remote areas with their gold pans. Rich gold bearing gravels were found in most all western states, with gold panning as the method to trace gold back to a placer deposit or find the hard rock source of the gold.
How to pan for gold
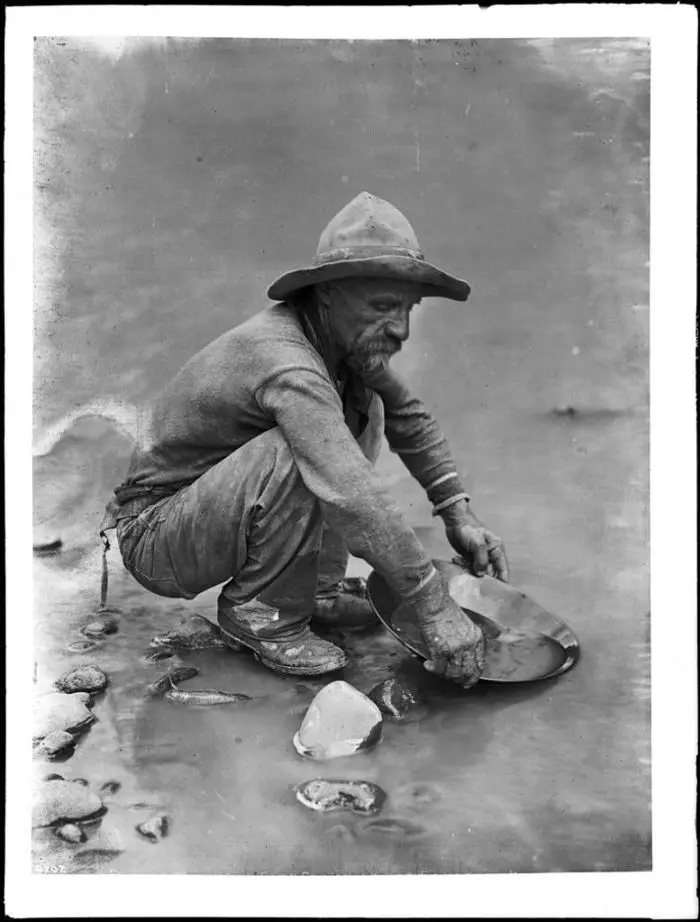
Gold panning is a pretty straightforward simple process, not to mention a lot of fun. Because gold is so much heavier than most other materials found in gravels, it will readily sink towards the bottom of a gold pan.
Fill the gold pan about half way with gravel, hold the pan just under the water surface (in a calm part of the stream) and break up any clumps or clods of dirt by hand. Remove the bigger rocks too, keeping an eye out for nuggets and quartz with gold in it. You never know.
Use a steady and vigorous side to side, then back and forth shaking motion. Water mixed and moving with river gravels will unweight the gravel and form a slurry, allowing even very fine gold particles to sink through the gravel and sand and to concentrate or stratify close to the bottom of the pan. Shake back and forth 15 or 20 times, then tilt the pan slightly and use water to sweep off some of the lighter top gravels.
The whole process is repeated several times, each time the amount of material left in the pan becomes less and less. When you have a small amount of material left in the pan, be careful, as this is when you may wash gold right out of the pan.
You should notice black heavy sand on the bottom layer, don’t wash this out. If you have any gold it will be directly below the black sand, or even mixed in with it. With an inch or less of water in the pan carefully sweep the black sands aside to uncover your gold. Use your hand to tap the edge of the pan at this point as it will help to separate the gold and black sands even more.
Black sands are usually mostly magnetite and are quite heavy and tend to pack together, so take your time and do this last step carefully. At this point, if you’ve picked a good spot, you can use a little squeeze bottle with a tube called a snuffer bottle, to vacuum up the gold.
If it’s not a good spot, move up or downstream a ways and try another pan. Gold panning takes some practice, keep trying and soon you will develop a feel for it and become a quick and efficient gold panner.
It’s usually good practice to pan for gold where it’s been found before. Although gold has been found in all 50 states in varying amounts, so there may be a stream near you, where you may find a little AU.
Make sure to check for any restrictions, closed areas and of course get permission on private land or active claims. Check my post, How to Find Gold – Mining Research for more on how to check land status.

Gold Panning tools and accessories
One of the best things about gold panning, is that you need very little besides a gold pan. Maybe a small folding shovel or even a metal garden trowel, and you’re good to go. That being said, there are some accessories and tools that will make you more efficient and help you process more material.
Basic gold panning equipment
Gold pan
I recommend a green plastic pan with riffles on one side. Gold shows up very well against a green background. The green pans are solid and durable. Garrett makes a good one. I have two of them.
I don’t like the black pans all that much, most scratch easily and are made of a softer plastic that can become warped and lose it’s shape. Steel pans are heavy and they rust easily.
Folding Shovel
Pry Bar
Gravel Screen
A small screen to sift out the larger gravel. They are usually round, and some will fit on top of a five-gallon bucket. One-half inch openings are good. Check the gravel before you toss it. You do not want to throw away any nuggets.
A five gallon bucket can also be useful for carrying gravel down to the stream to pan, for carrying some of your gear, and as a makeshift seat. Here are a few more small accessories you’re going to need:
Snuffer Bottle. A small plastic squeeze bottle with a tube to vacuum up the fine gold out of your pan.
Tweezers to pick up the larger flakes.
Glass Vial to securely hold and display your gold.
Hand Magnifier or loupe to help you tell the difference between gold and other shiny metallic looking stuff that may collect in your pan. see my post Pyrite – Fool’s Gold for more on that.
I recommend taking your black sand and gold mixture, called “concentrates”, back to camp or home with you. Then you can take your time to do the final separation, called “clean-up”. That way you will have more gold panning time in the field.
Gold Panning Kit
Or you can buy a gold panning kit that comes with gold pan, screen, snuffer bottle, tweezers, a small magnifier, and even glass vials to put your gold in. If you are just starting out gold panning, this might be the way to go. They come with different accessories and prices. Here is a good, simple starter kit, and here is a pretty thorough one.
Where to go Gold Panning
There are many streams and rivers across the southwest where you can pan for gold. If you’re a beginner and live around, or travel to Los Angeles or Phoenix, there are two areas you might want to check out. Click on the thumbnails below for driving directions and a downloadable KML file.
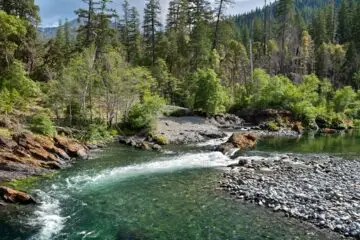
East Fork San Gabriel River
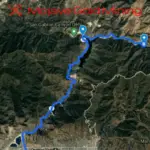
Google Maps route from Azusa, California to East Fork San Gabriel River
Only about 15 miles north of Azusa, California, the East Fork San Gabriel River is a beautiful area in the Angeles National Forest.
Popular with outdoor enthusiasts of all kinds including both the beginner and experienced gold prospector.
The best gold panning and sluicing areas are to the east of the Camp Williams Resort, store and cafe. This area has a long history of placer and hard rock gold production, amounting to several million dollars and dating back to the 1850’s.
Today’s prospector can do quite well gold panning, sluicing and metal detecting here. There have been large nuggets found, some quite recently. This is rattlesnake and mountain lion country, so be aware of your surroundings.
Lynx Creek
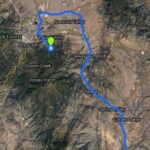
Google Maps route from Phoenix to Lynx Creek and KML file
The Lynx Creek area has also had a large amount of placer gold recovered dating back to the 1860’s. Located above Prescott Valley, Arizona about 95 miles north of Phoenix.
The Lynx Creek area is within the Prescott National Forest, and is some truly beautiful country.
The Forest Service has set aside several miles of Lynx Creek just for recreational gold panning and gold detecting.
A great place for beginners, you have plenty of creek to practice your gold panning skills. Also rattlesnake and big cat country.